You are the owner of www.ithaityson.com. Digging your website shows that it is currently configured like this.
;; ANSWER SECTION:
www.ithaityson.com.	3599	IN	CNAME	ithaityson.com.
ithaityson.com.		119	IN	A	198.71.233.184
No one eats at your restaurant so you've decided to franchise as a Captain Ds location. Digging locations.captainds.com returns
;; ANSWER SECTION:
locations.captainds.com. 59	IN	CNAME	captainds.momentfeed.com.
captainds.momentfeed.com. 59	IN	CNAME	prod-norcal-llp-alb-986012353.us-west-1.elb.amazonaws.com.
prod-norcal-llp-alb-986012353.us-west-1.elb.amazonaws.com. 59 IN A 54.193.72.95
prod-norcal-llp-alb-986012353.us-west-1.elb.amazonaws.com. 59 IN A 52.8.234.119
Captain Ds corporate has built a shiny new website for you and in order to start using it they've asked you to update your DNS to also CNAME to captainds.momentfeed.com. It's easy enough to update your DNS record, but how do you verify that everything will work before actually doing it? Ideally you'd be able to browse the web and click links as normal but be able to see the results of the new DNS configuration.
This page summarizes how to mimic the effects of an arbitrary DNS CNAME change locally.
The first thing you might consider is to modify the /etc/hosts file. Unfortunately this can only alias domains to explicit IPs so it's not possible to totally replicate the change.
To really mimic the DNS update we need to set up a DNS server locally that can return the records that we want. There are a couple of steps to doing this.
A recursive DNS server is what typical hosts talk to in order to learn the IP of a domain. It's essentially a cache that knows who to ask for more information in the case of a cache miss.
Download the recursive DNS resolver Unbound with `brew install unbound`
/usr/local/etc/unbound/unbound.conf. It's educational to read the file and more documentation
of the many options is available here but what we want is this:
server:
  username: <YOUR USER NAME>
  logfile: "/etc/unbound/unbound.log"
  pidfile: "/etc/unbound/unbound.pid"
  # listen on all interfaces, answer queries from the local subnet.
  interface: 0.0.0.0
  interface: ::0

# forwards all requests to google's dns server at 8.8.8.8
forward-zone:
  name: "."
  forward-addr: 8.8.8.8@53
Make sure to replace <YOUR USER NAME> with a user name that exists on your computer. (this is the user whose permissions unbound will assume after starting)
start unbound with `sudo unbound -d`
the -d flag prevents it from running in the background so you can see logs and easily kill it with ctrl-c
`dig www.google.com @127.0.0.1` should give you a normal result.
;; ANSWER SECTION:
www.google.com.		191	IN	A	172.217.15.100
local-data option that allows for DNS records to be included directly in its config but
much like the hosts file CNAME records are not supported. For that we need an authoritative DNS server.
Sitting behind all of the recursives caches, an authoritative DNS server is what is responsible for providing the final information about what ip each domain lives at. These are often owned by domain registrars.
Download the authoritative DNS resolver NSD with `brew install nsd`
/usr/local/etc/nsd/nsd.conf. Again it's useful to read the default file (/usr/local/etc/nsd/nsd.conf.sample
and config options), but this is what we want for now:
server:
  zonesdir: "/usr/local/etc/nsd"
  username: <YOUR USERNAME HERE>
  # Need to specify this because the default port
  # is 53 which conflicts with Unbound
  port: 53530

# this allows us to control the running NSD
# instance with nsd-control
remote-control:
  control-enable: yes

# specifies a zone this server is responsible for
# and where to find its configuration
# there's such a thing as 'reverse dns' which is irrelevant
# but is why the zone file has a .forward
zone:
  name: ithaityson.com
  zonefile: ithaityson.com.forward
Create the zonefile referenced by the config at /usr/local/etc/nsd/ithaityson.com.forward.
This should be the content:
$ORIGIN ithaityson.com.    ; default zone domain
$TTL 3600               ; default time to live

ithaityson.com. IN SOA ns1.ithaityson.com. hostmaster.ithaityson.com. (
          2011010203  ; serial number
          28800       ; Refresh
          7200        ; Retry
          864000      ; Expire
          86400       ; Min TTL
          )

ns1.ithaityson.com.   3600    IN  A   127.0.0.1   ; specifies the location of a nameserver who can locate ithaityson.com
www.ithaityson.com. 3600    IN  CNAME  captainds.momentfeed.com. ; the CNAME we're trying to test!
More details about the zone file can format can be found here and the SOA record in particular here
Set up the nsd controller by running `nsd-control-setup`. This allows you to reload zone file changes with `nsd-control reload`
without having to restart nsd.
Start nsd with `sudo nsd -d` (the d again prevents it from running in the background)
Now there's an authoritative DNS server running on port 53530. At this point you should be able to dig directly at that port and see your custom CNAME. (Note that because the authoritative server doesn't recurse this only returns the CNAME and not the final IP)
`dig www.ithaityson.com -p 53530 @127.0.0.1`
returns:
;; ANSWER SECTION:
www.ithaityson.com.	3600	IN	CNAME	captainds.momentfeed.com.
Now that that there is an authoritative DNS server for ithaityson.com, all that remains is letting Unbound know that it should use that server instead of the default to resolve ithaityson.com pages.
A couple things need to be added to the unbound config. Nested under server: add:
local-zone: ithaityson.com nodefault
domain-insecure: "ithaityson.com"
then at the top level of the config add
do-not-query-localhost: no

stub-zone:
  name: "ithaityson.com"
  stub-addr: 127.0.0.1@53530
  stub-no-cache: yes
After making the updates above, kill and restart unbound with the same command from before (`sudo unbound -d`) and update your
computer's setting to use localhost for DNS.
(under System Preferences > Network > Advanced > DNS).
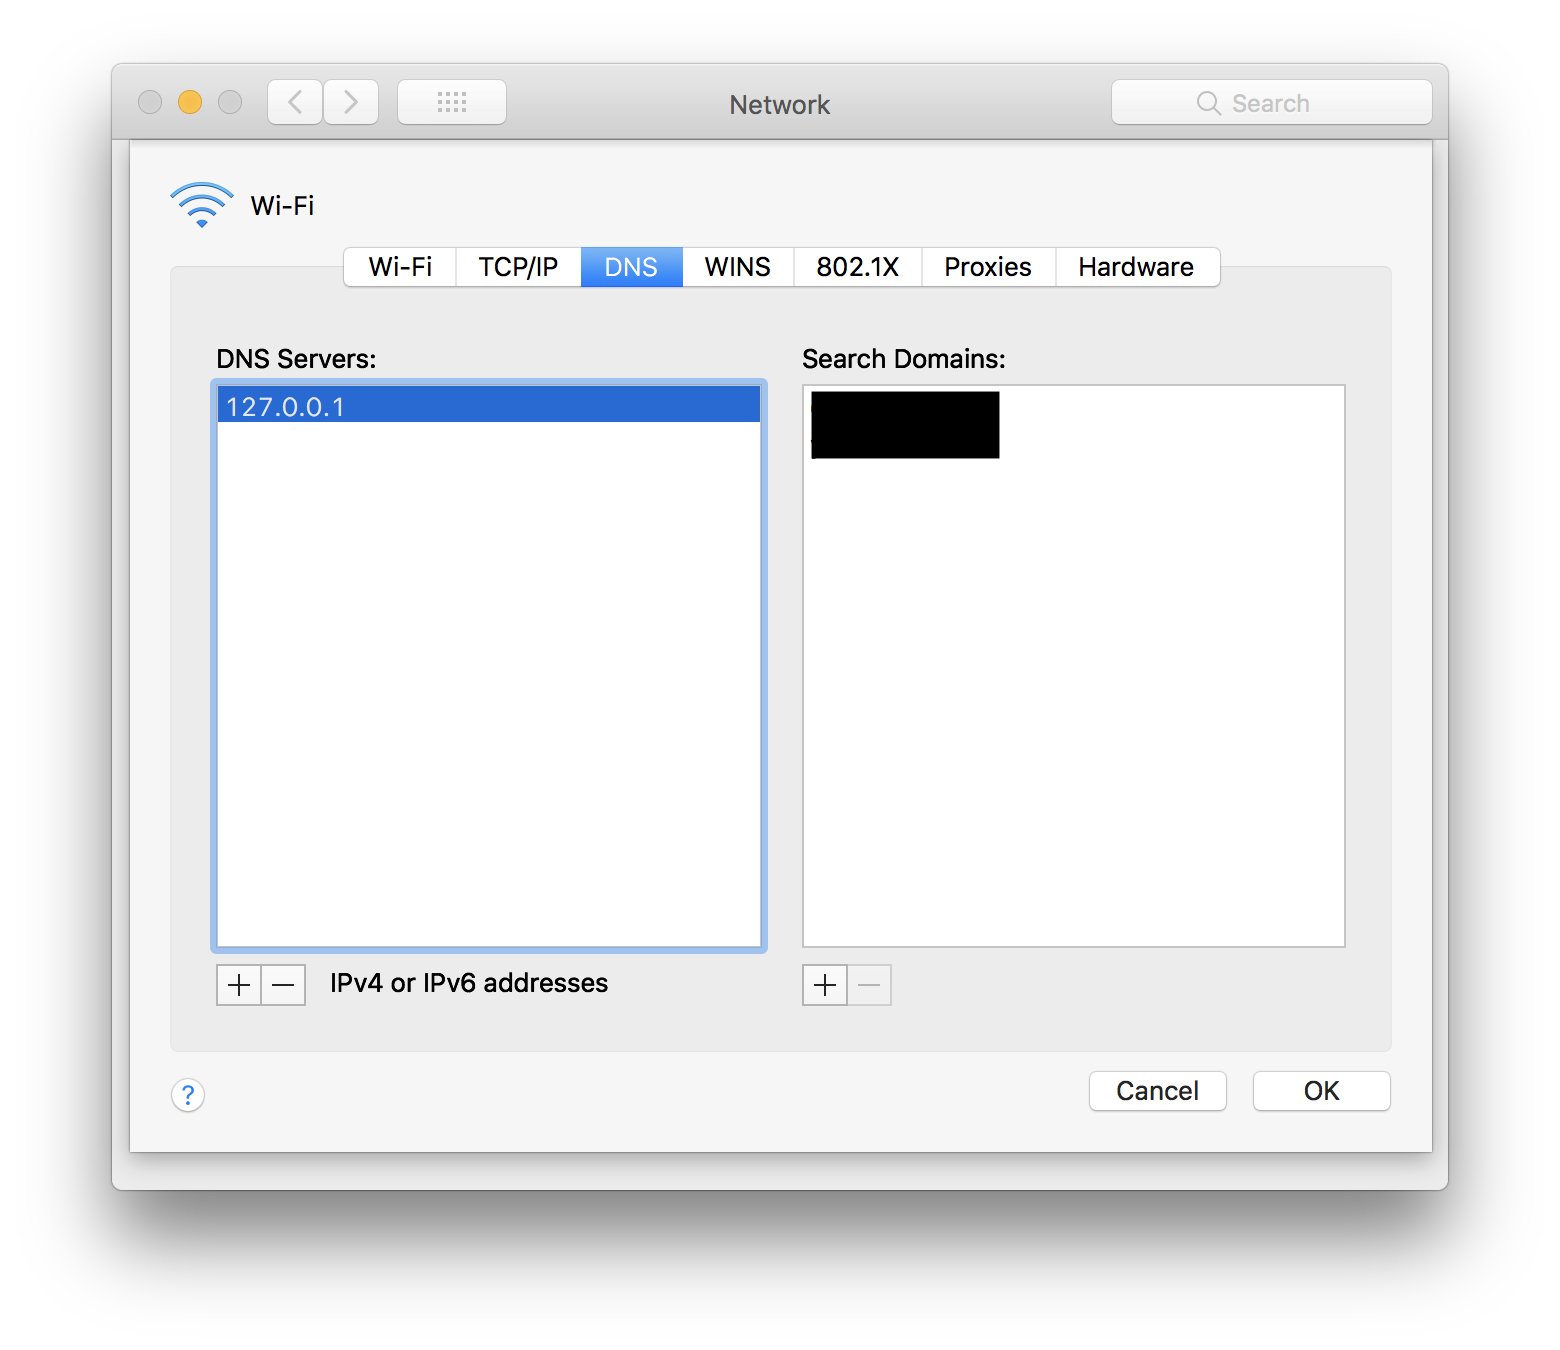
Make sure to hit Ok and then Apply as well.
Now doing a regular dig should return the full updated DNS path.
`dig www.ithaityson.com`
;; ANSWER SECTION:
www.ithaityson.com.	3600	IN	CNAME	captainds.momentfeed.com.
captainds.momentfeed.com. 59	IN	CNAME	prod-norcal-llp-alb-986012353.us-west-1.elb.amazonaws.com.
prod-norcal-llp-alb-986012353.us-west-1.elb.amazonaws.com. 59 IN A 52.8.234.119
prod-norcal-llp-alb-986012353.us-west-1.elb.amazonaws.com. 59 IN A 54.193.72.95
Finally, you can visit www.ithaityson.com in your browser to see how your new site will look. (it won't look like anything because this is a made up example and most things won't serve content to just anyone who CNAMEs to them).